Page History
...
- Select Settings. You can usually find this in your Menu button.
- Select Wireless & Networks
- Select WiFi Settings
- Select Turn Wi-Fi on if it is not on.
- Select From your list of available networks select SU-Connect.
- Open your web browser and go to http://connect.salisbury.edu/
- If you get a certificate message, tap Continue to accept the certificate..
Choose Personally Owned Device or Salisbury University Owned Devices (having an SU tag).
Leave Local Server selected and click Download
In Step One, change the download option to Local Server and then tap Download and click OK to save the file.
- Once the download is finished, you can access the SecureW2_JoinNow.apk file from your Downloads by swiping down from the top of your Android.
- Tap Install.
- If the Install is blocked, then tap Settings.
- In Unknown Sources, toggle the setting to allow installation of apps from unknown sources.
- Click OK to the confirmation window.
- Then go back and try to install again.
- When the install is finished, return to your web browser and tap JoinNow in Step 2.
- Tap Personally Owned Device.
- If you do not have this option, you may be able to manually start it by opening the JoinNow Multi-OS app and tap Search and Setup New Network. Then enter “salisbury.edu” for the Domain and click Continue. Then tap Personally Owned Device and proceed.
- Enter your username and password and tap Continue.
- If you get a message “It appears a connection could not be made to the configured network” reconnect to SU-Connect and then return to the JoinNow Multi-OS app and tap Reconnect.
If you receive a warning stating "This type of file can harm your device. Do you want to keep SecureW2_JoinNow.apk anyway?" Choose OK.

You may receive a message stating your phone is not allowed to install unknown apps. Select Settings and verify "Allow from this source" is enabled.


When prompted "Do you want to install this application?" select Install or Open.

You will be brought to the screen shown below with Secure W2 at the top. When you arrive at this screen go back to the browser used initially and select Join Now.


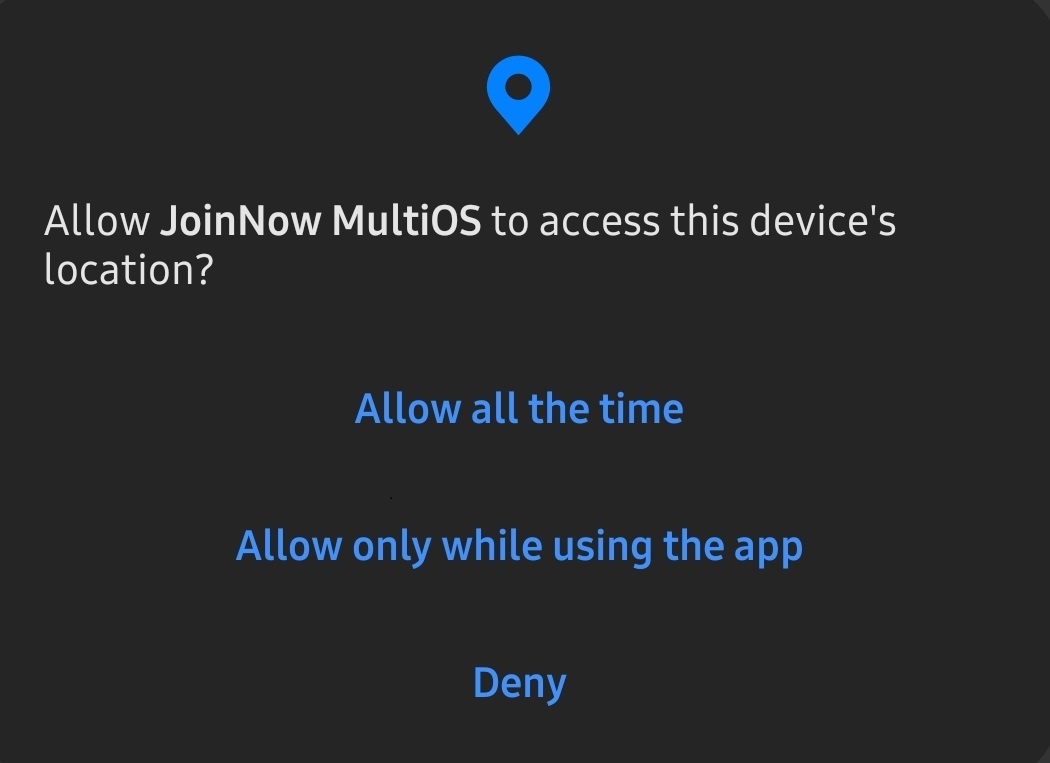
If you have location sharing turned off you will see Location Permission Required. Please select Yes, App will configure and connect.

Give permission (Allow) for the JoinNow MultiOS app to access your location.
Enter your SU username and password when prompted and select continue.

You have now connected to SU-Secure. Click Next to continue.

You're finished! Choose Done to complete the process.
Click Done once you get the screen that says “You have successfully connected to: SU-Secure.”
Manual Setup
For some devices manual connection is required, if the connection wizard does not work, you will need to manually configure the settings. This may vary depending on your device (check your manual or help files for information).
...