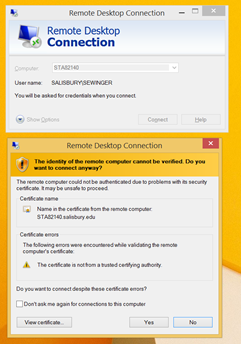
This guide covers using Remote Desktop Connection to connect to your Windows-based SU computer from home.
Please be aware that your SU device must be powered on, not in sleep mode, and connected to the internet at all times for this option to work.
A great alternative to using Remote Desktop is to save your files to OneDrive for access or see Accessing Network Drives via On-Demand VPN for instructions on accessing departmental drives from a personal device.
In order to use Remote Desktop, both your SU device and home device must be Windows based devices and connected to the internet.
**If you are connecting from home using a Mac device, you must connect to the VPN using Step 4-Method 2(see below) and use the Microsoft Remote Desktop application found in the App store. 
**Your office computer must remain powered on for you to make a connection from offsite.
Faculty and staff must submit a ticket at Technology Support (http://support.salisbury.edu), select Logins, Accounts, and Access , and then select "I need to Remote to my Desktop PC".
In the area titled "Why do you need access?" It would be helpful to list the SU tag number located on the computer you wish to remote connect to.
Once you have been approved for Remote Access you will need to restart your PC.

Open Software Center on your office PC (that you wish to connect to Remotely) and select "Request Remote Desktop Access" then choose Install.
**The user who wishes to have the remote access must be logged into the SU computer when running the Request Remote Desktop Access installation.
**If you are off campus and cannot complete this step please contact the Help Desk at 410-677-5454 or complete a ticket request online at http://support.salisbury.edu

You will need to make note of the IP address of your office computer (that you will connect to).
3. Select the connection type for your machine(Ethernet or Wifi) on the left panel
4. Click on the connection type again, either Ethernet or Wifi, in the right panel
5. You will need the address listed as the IPv4 address
**If you are off campus and need your IP address please contact the Help Desk at 410-677-5454 or complete a ticket request online at http://support.salisbury.edu
Once the above steps are completed and you are at home/offsite use one of the three methods below to initiate the connection to your SU office computer from your personal Windows based computer.
If you are connecting to your office pc using an SU owned device with Global Always-On VPN installed please complete the following:


If you are connecting to your office pc using a personal computer please use complete the following to connect using the On-Demand VPN:

2. Login to your SU faculty/staff/vendor provided username and password. Once logged in, you will see the following screen:

3. Download and install the appropriate device specific Global Protect Agent.
4. Once installed, open the Global Protect client on your personal device. If prompted for a portal address, enter remote.salisbury.edu as the address.
5. If prompted to "Add VPN Configurations", click allow to accept the settings for the Global Protect client.
6. When prompted, enter your SU faculty/staff/vendor provided SU username and password.
7. You would see the Global Protect icon in your system tray (near your clock and date)

8. Click or tap Connect.
9. You will be prompted for your SU username and password on this screen:

10. You will then be prompted to DUO authenticate from this screen. Choose your method of two factor authentication to login.

11. Once connected, you should see the SU Acceptable Use Policy. You can close this window.
12. Go to Step 5: Start Remote Desktop Connection


