Page History
...
- Log into GullNet at http://www.salisbury.edu/gullnet
- Click NavBar > Navigator > SU Custom.Click SU Custom.
- Click Student Records.
- Click Report.
- Click Student E-Mail List.
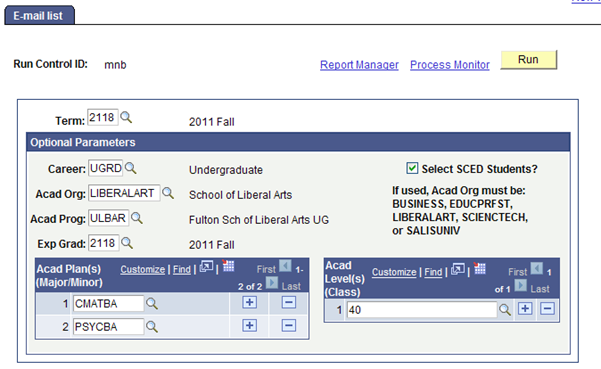
- Select the Term and the optional parameters. In the example below, all of the prompt boxes are filled, but typically only one or two options are sufficient. Leaving a field blank will select all possible values. You can also select multiple plans or levels in any combination. The Acad Prog will rarely be used, so you should leave that blank.
- Click Run.
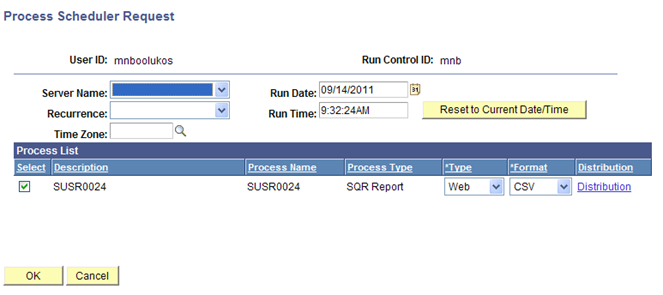
- In the Process Scheduler Request page, change the Type to Web and the Format to CSV in the Process List.
- Click OK.
- Click on Process Monitor, and then on the Process List page, click Details.
- Click View Log/Trace on the Process Detail page.
- In the View Log/Trace window, the first CSV file listed is the file of Outlook email addresses. The second CSV file is a list of bio/demo data and academic statistics for each person.
- Right click the first CSV file listed (the listing of Outlook e-mail addresses) and choose Save Target As…
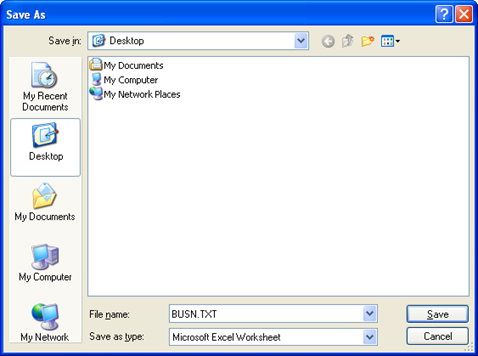
- In the Save As window, name the file with a .TXT extension (e.g., BUSN.TXT) and save it to somewhere you will be able to find it, such as the Desktop. Leave Save as type: as Microsoft Excel Worksheet. Click Save.
- Right-click the second CSV (the bio/demo data) and choose Save Target As…
- In the Save As window, name the file with a .CSV extension (e.g., BUSN.CSV) and save it to somewhere you will be able to find it, such as the Desktop. Leave the Save as type: as Microsoft Excel Worksheet. Click Save.
...


